Description
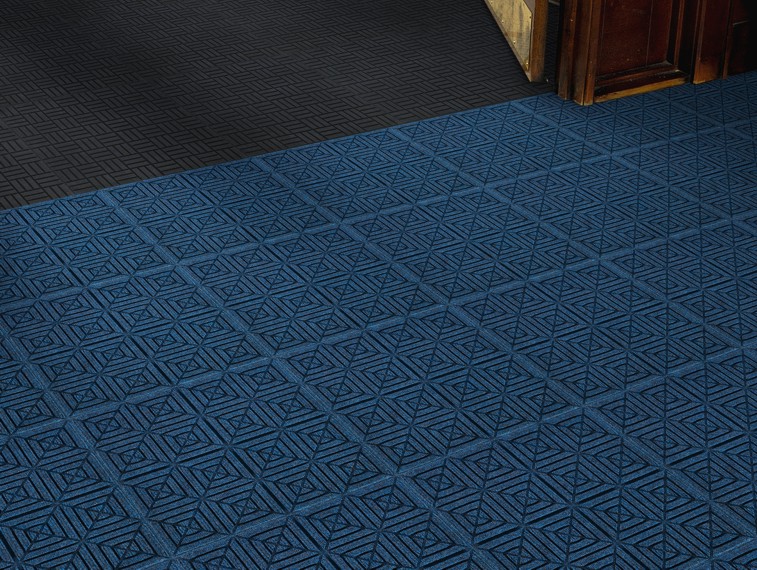
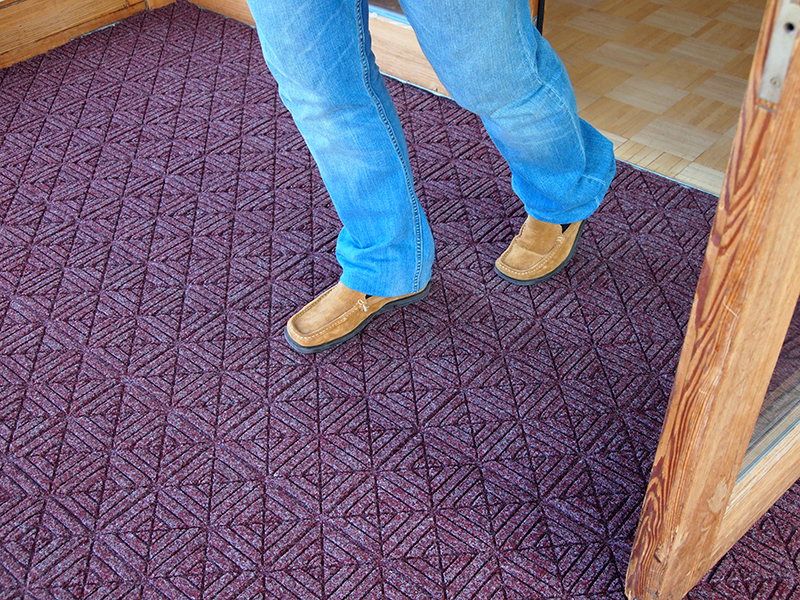
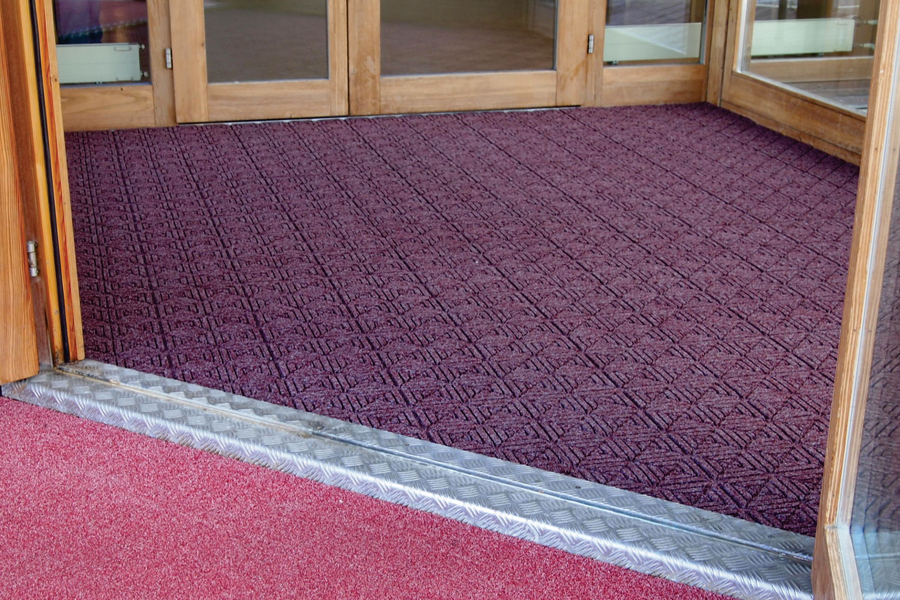
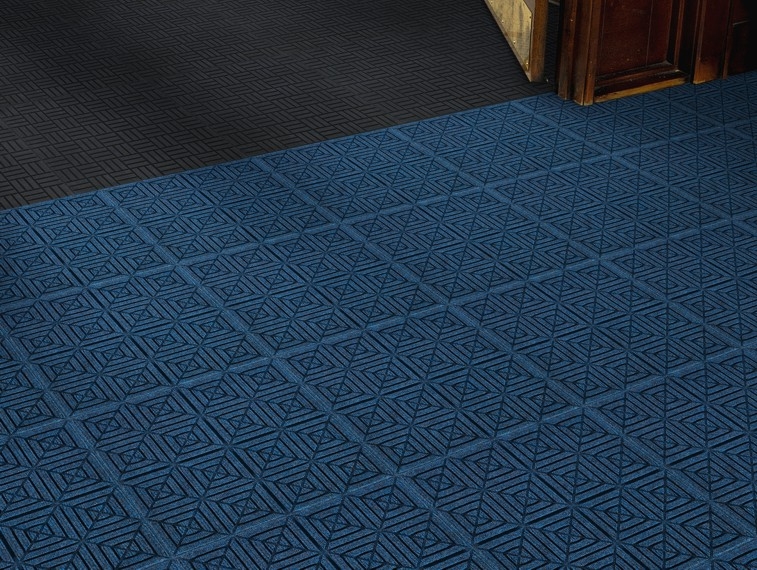
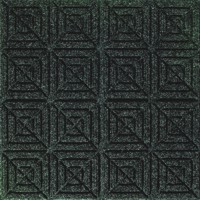
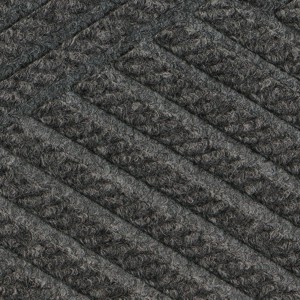
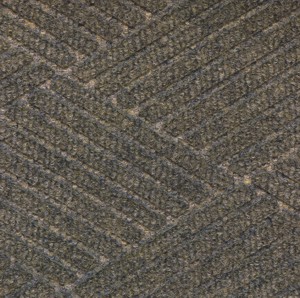
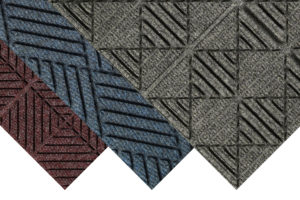
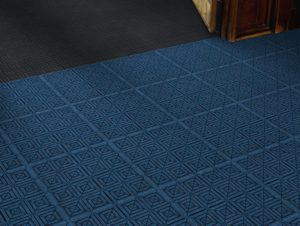
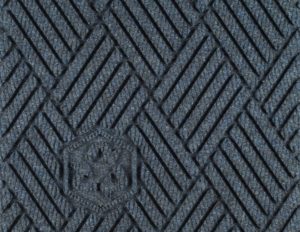
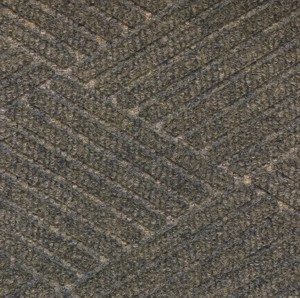
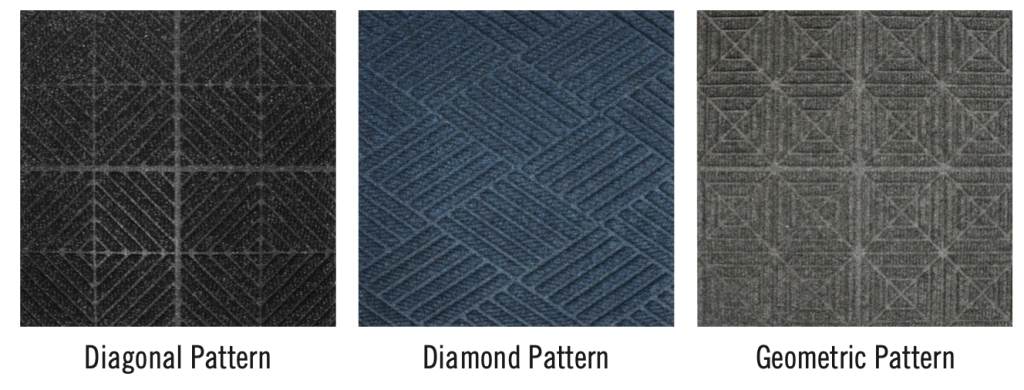
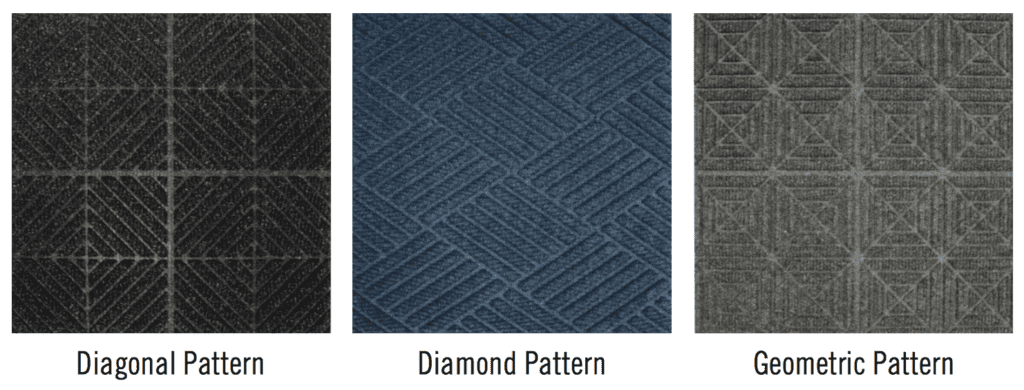
- Waterhog Eco Premier carpet tiles have 3 Great Patterns – Diagonal, Diamond or Geometric. SEE PATTERNS
- The Waterhog Eco Premier Carpet Tile is a Heavy Duty entrance matting system that is Earth Friendly – With a 30 oz, 100% post-consumer recycled PET Polyester fiber derived from used plastic bottles for the face and a rubber backing.
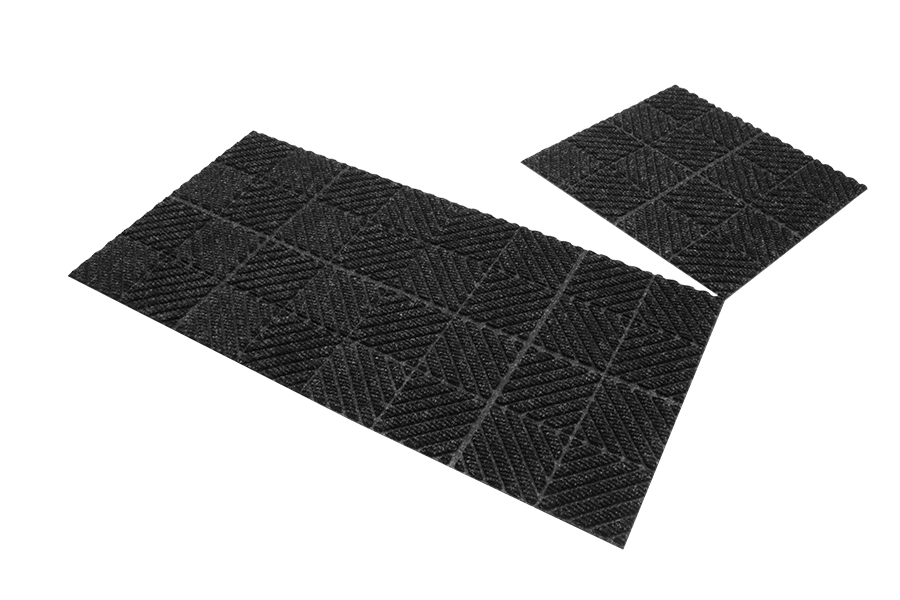
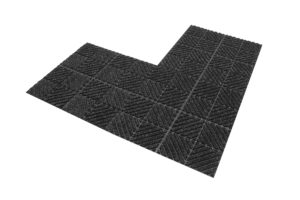
- Each Waterhog Carpet Tile measures 18″ x 18″
- Waterhog Eco Premier pattern carpet tiles are Eco Friendly – Every square foot eliminates 4 half liters of plastic bottles from the waste stream.
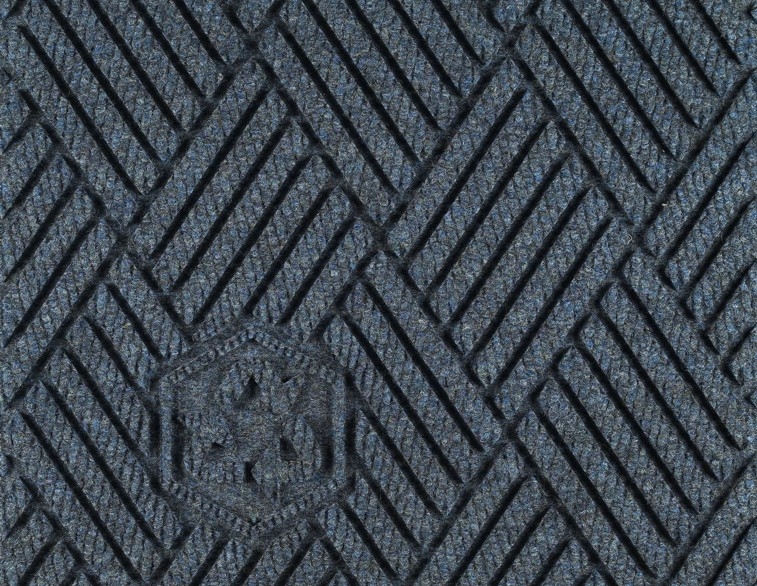
- With a permanent rubber reinforced bi-level surface design, Waterhog Eco Premier Carpet Tiles will not suffer pile crush and will provide years of superior dirt and moisture collection. Using Waterhog tiles ensures for a superior door mat system
- Modular flexibility to handle small to large entrance mat areas – and also entrance mat areas with odd configurations
- Each pattern may be special ordered with the universal recycle symbol molded into the pattern.
- The Waterhog Eco Premier pattern carpet tiles have thicknesses of 1/4”
- 1/4″ floor mat tiles are shipped 12 to a case. (Square foot a case = 27)
- We recommend using a Solvent Free, Multi-Purpose Adhesive for installation of the Waterhog Eco Premier carpet tiles.
- 1 gallon of Multi-Purpose Adhesive covers approximately 117 square ft.
Also check out our Waterhog Classic Carpet Tiles
Patterns
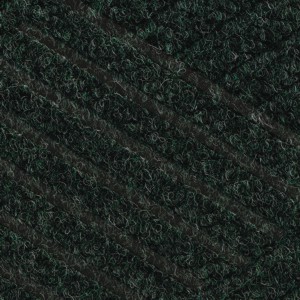
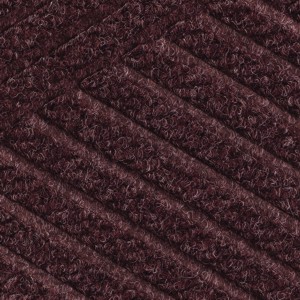
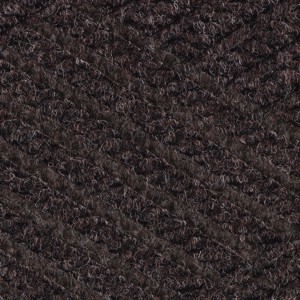
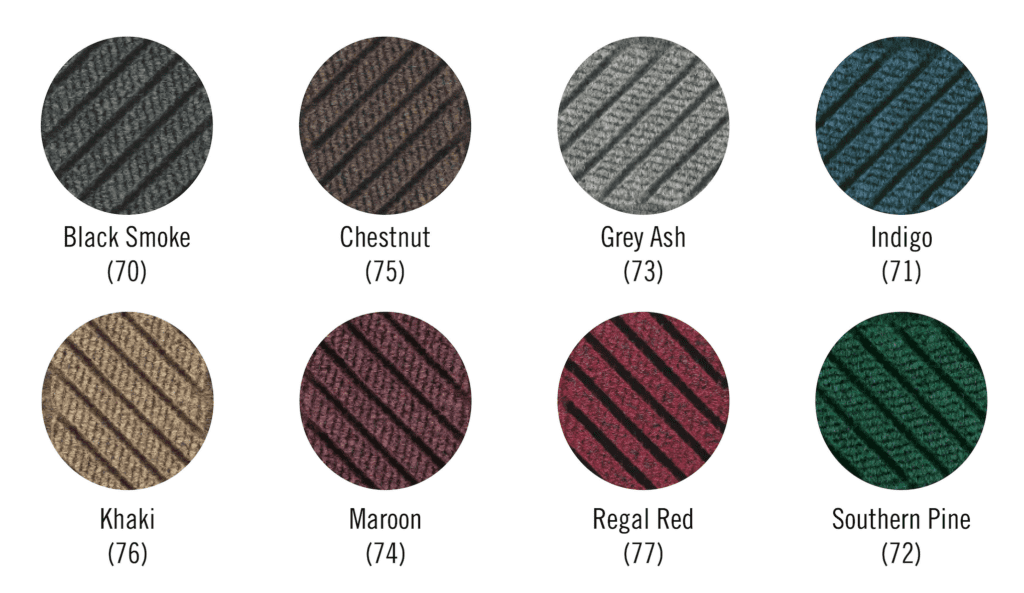
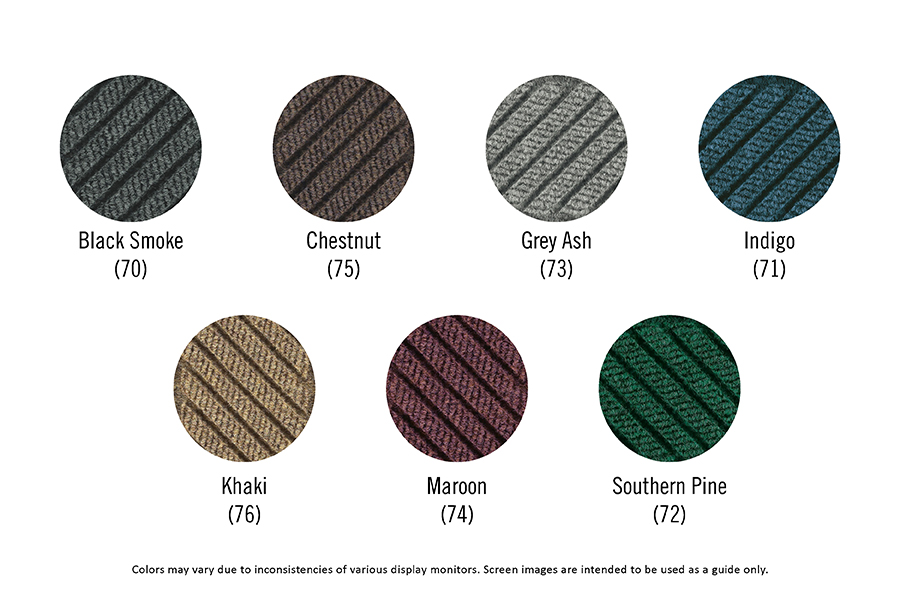
COLOR OPTIONS
*COLOR- REGAL RED HAS BEEN DISCONTINUED. ALL OTHER COLORS STILL AVAILABLE
Specifications
SURFACE
Material: Solution-dyed PET (polyethylene terephthalate)
Weight: 30 ounces/yard2
Construction: Needle-punched
Design: Diamond, Diagonal, or Geometric
BACKING
Material: SBR rubber – universal cleated
Thickness: 100-mil
Overall Tile Thickness: 100-mil tiles: 1/4 inch (0.2500″)
STANDARDS & TESTING
- Certified high-traction by the National Floor Safety Institute (NFSI)
- Passes DOC-FF1-70 for the surface flammability of carpets
Cleaning Instructions
Waterhog Eco Tile mats can be cleaned using the following instructions:
- Vacuum regularly (daily in high-traffic commercial areas; weekly in lower-traffic areas)
- Extract or hose off as needed to remove heavy soil/debris
- Hang mat to dry
Always make sure the mat is dry before placing it back in service.
Installation Instructions
Determine the Number of Tiles You Will Need
- Measure the length and width of the area of carpet.
- Multiply the width by the length to get the square footage of the space.
- For areas that are not rectangular, break the area into smaller rectangles. Multiply the width by the length for each small rectangle, then add up all results to calculate the overall square footage.
Prepare for Installation
- Remove any old floor coverings, debris, and adhesive from the floor.
- Clean the entire floor surface of any dust, drywall mud, etc.
- Once the floor has been cleaned, allow it to dry completely.
- Allow the tiles to sit in the area uninstalled for several hours so they can acclimate to room temperature prior to installation.
Layout Your Grid
- Determine the center of the area by snapping chalk lines between the midpoints of the areas opposing sides.
- Measure from the center point (the point at which two chalk lines converge) up to three feet and make a mark.
- Now measure from the center point to the left four feet and make another mark. If the distance between these two marks is five feet, then your reference lines are perfectly square.
Install the Tiles
- Apply your adhesive to the prepared flooring according to the adhesive manufacturer’s directions. We recommend CA024 solvent-free adhesive for both indoor and outdoor installations. Never us an adhesive that contains solvents.
- Starting with one quadrant, install a row of full tiles along both reference lines.
- First, apply the adhesive using a paint roller.
- Next, place the tiles along the reference lines, applying firm pressure with the palm of your hand to ensure good contact with the adhesive. Tiles should be placed snug against the adjacent tiles, and their edges accurately aligned with one another.
- Continue by placing tiles row by row, using the stair step method, always starting at the center and moving toward the side.
Trim/Fit the Perimeter Tiles
After you have placed all the full tiles, the perimeter tiles must be accurately marked and cut to fit snug against the side.
- Start by placing the tile to be cut directly on top of the last tile in a row.
- Next, position another tile against the wall and on top of the tile to be cut.
- Make a mark on each side where the outer corners of the top tile overlap the tile to be cut.
- Remove the tiles, and using a sharp utility knife and a straight edge, cut through the back of the perimeter tile between the two marks.
- Use this same procedure to cut and fit the rest of the perimeter tiles.
Available Sizes
18″ x 18″ x 1/4″ (12 tiles/case)